THEME CONFIGURATION
The configuration of JamSession theme is simple and intuitive. Below, we’ll describe how to define configure it according to your needs by defining the menu, using theme customizer, theme settings, adding slides, image posts, video custom posts and events.
Creating a maintenance page
You may want to show the visitors a custom page, while setting up your website. JamSession theme helps you do that, by creating a maintenance page. Please follow this steps:
1. Go to Pages -> Add New
2. Select a title for your page (like “Comming Back Soon” or “Comming Soon”). This name will be visible on the maintenance page.
3. Insert the text content that you want your visitors to see.
4. Add a featured image for this page – the featured image will be the background for the new maintenance page, so please use a good resolution.
5. Set the page template for this page to Maintenance Page from the bottom right part of the page.
6. Save the page.
7. Go to Appearance-> JamSession Settings
8. On General Options you must set Maintenance Mode to Maintenance Mode Enabled and on Maintenance Page select the page you’ve just created, based on the Maintenance Page template.
9. Press on Save Changes and this should be all. Admin and logged in users should be able to see the real version of the website, while the rest of the visitors will see the maintenance page.
Main Menu
Go to Appearance -> Menus and click on create a new menu option. Give it a name, Main Menu for instance and click on Create Menu. A new tab tab option, Manage Locations should appear now. Edit your Menu by adding elements from the left side of the page. When you are done, click on the 2nd tab, Manage Locations, select the menu you just defined and click Save Changes. The menu should now be visible on the front page.
Create Main Slider Page For The Built In Slider
In order to have the main slider as homepage of your website, you just need to create a empty page and use Main Slider Page as template for that page.
1. Go to Pages -> Add New
2. Add a title for the new created page – Main Slider Page
3. Select the template to be used for that page – Main Slider Page
4. Click on Publish and the page is now created.
5. Go to Appearance -> Customize
6. Select Static Front Page option on the bottom left of the page
7. Select the page you’ve just created – Main Slider Page for static front page
8. Click on Save and you have a slider on homepage.
Create Main Slider Page For Slider Revolution
For a more complex slider, you have the option to use Slider Revolution and benefit from the great options that this slider offers. If you want to create the main slider page, based on Slider Revolution, please follow the following steps.
1. Go to Pages -> Add New
2. Add a title for the new created page – Main Slider Page
3. Select the template to be used for that page – Main RevSlider Page
4. Make sure that you are editing the page with Visual Composer, in Backend editor.
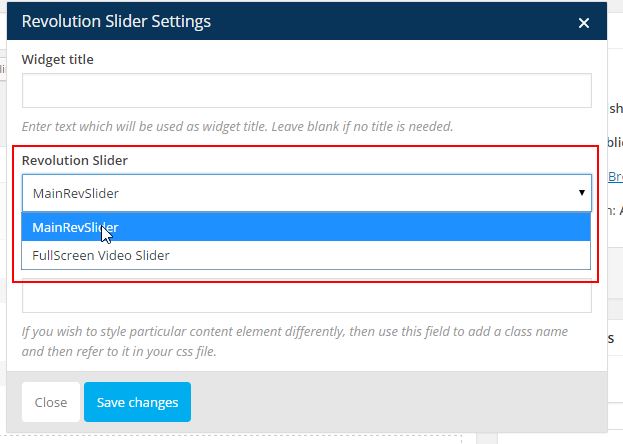
5. Click on Add Element and select Revolution Slider
6. In the Revolution Slider Settings window, please select the slider you want to add on this page. Please notice that you need to create the slider before reaching this point, so the slider will be shown in the drop down list.
7. Click on Publish and your main slider page is not created.
8. Go to Appearance -> Customize
10. Select Static Front Page option on the bottom left of the page
11. Select the page you’ve just created – Main Slider Page for static front page
12. Click on Save and you have a slider on homepage.
Please check the screenshots below for few visual details:


